Instructions
Download dataset
In all tutorials, we use open-access data of medical images of various cancer types (Glioma, sarcoma…) and with different imaging modalities (MR, CT, and PET). All data has been pre-processed to adhere to package norms.
In order to run the tutorials, you must first download the dataset. We recommend downloading only a subset (~347 MB) instead of the full dataset (~3.2 GB). To do so, run the following command in your terminal from the package parent folder:
python scripts/download_data.py --subsetNote
To download the full dataset, simply run the following command in your terminal from the package parent folder:
python scripts/download_data.py --full-sts
CSV file
Most tutorials, such as the BatchExtractor tutorial, utilize multiple scans, each with its CSV file.
MEDimagerequires a CSV file for each dataset; details can be found in the CSV File. Examples are available inMEDimage/notebooks/tutorial/csv.Note
Future versions of
MEDimageaim to automate the creation of these CSV files for each dataset.
Configuration file
To use
MEDimage, a configuration file is always required. An example file is available in the GitHub repository (MEDimage/notebooks/tutorial/settings/MEDimage-Tutorial.json), and documentation is provided Configuration Files. Different JSON configuration files are used for each case; for example, specific JSON configurations for every IBSI test are available inMEDimage/notebooks/ibsi/settings.
DataManager
The
DataManagerplays an important role inMEDimage. The class is capable of processing raw DICOM and NIfTI and converting them in intoMEDscanclass objects. It includes pre-radiomics analysis, determining the best intensity ranges and voxel dimension rescaling parameters for a given dataset. This analysis is essential, as highlighted in this article , which investigates how intensity window settings can impact radiomic feature stability for CT data.The tutorial for DataManager is available here.:
You can also find this tutorial on the repository
MEDimage/notebooks/tutorial/DataManager-Tutorial.ipynb.

MEDscan Class
In MEDimage, the
MEDscanclass is a Python object that maintains data and information about the dataset, particularly related to scans processed from NIfTI or DICOM data. It can manage parameters used in processing, filtering, and extraction, reading from JSON files and updating all relevant attributes. Many other useful functionalities are detailed in this tutorial:You can also find this tutorial on the repository
MEDimage/notebooks/tutorial/MEDimage-Tutorial.ipynb.
Single-scan demo
This demo provides a step-by-step guide to processing and extracting features for a single scan using
MEDimage. It covers various use cases, from initial processing steps to the extraction of features. The demo is perfect for learning how to use MEDimage for single-scan feature extraction.The interactive Colab notebook for the demo is available here:
You can also find it on the repository
MEDimage/notebooks/demo/Glioma-Demo.ipynb.
BatchExtractor
MEDimagefacilitates batch feature extraction through theBatchExtractorclass, which streamlines the following workflow: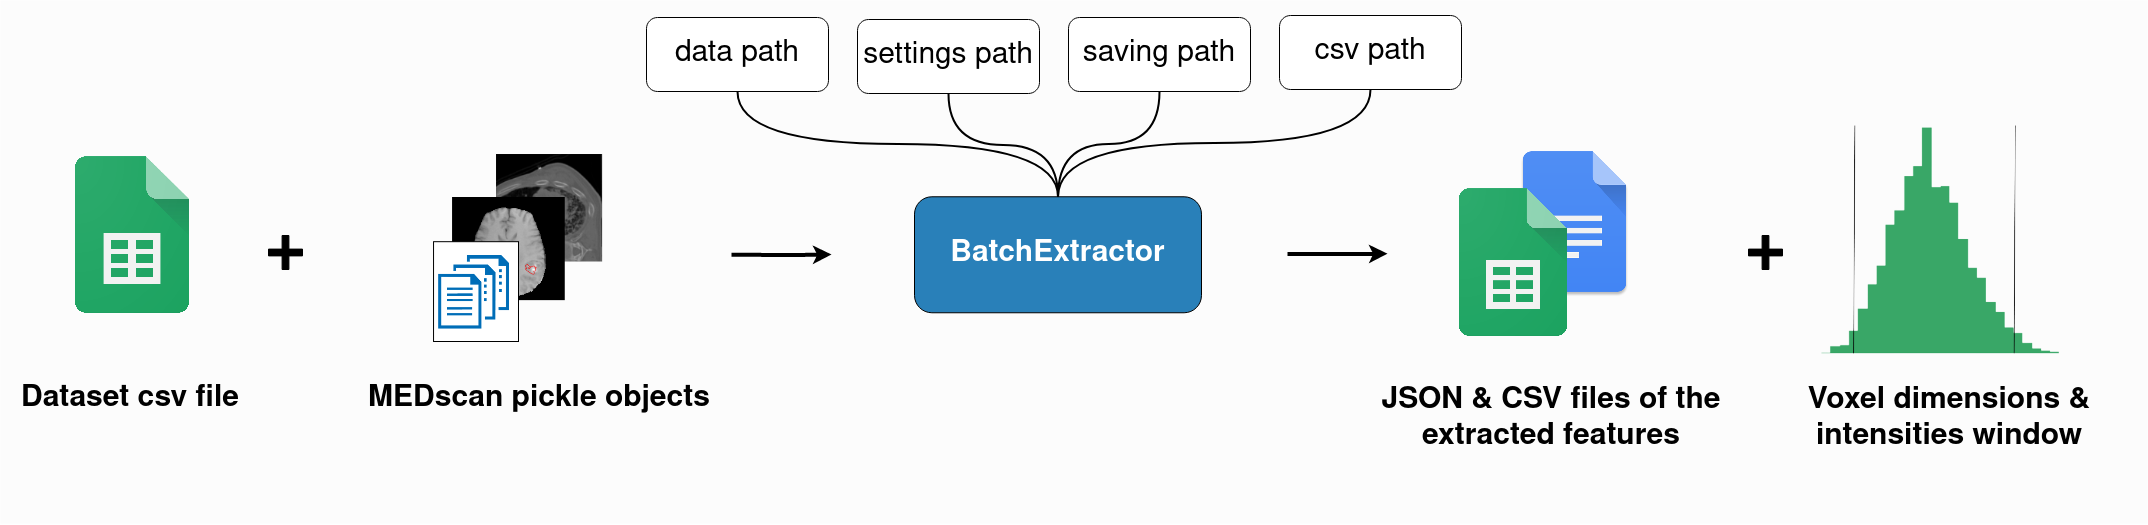
This class creates batches of scans and performs full extraction of all radiomics family features, saving them in tables and JSON files. To run a batch extraction, simply set the path to your dataset and the path to your dataset’s CSV File of regions of interest. (check example here).
Learn more in the interactive Colab notebook here:
You can also find it on the repository
MEDimage/notebooks/tutorial/BatchExtractor-Tutorial.ipynb.
Learning
Overview
MEDimageoffers a learning module for training a machine learning model on extracted features. The module handles features cleaning, normalization, selection, model training, and testing. The workflow is summarized in the following image:
Similar to the extraction module, the learning module also uses multiple JSON configuration files to set the parameters of the learning process. Details about the configuration files, are available here: Configuration Files. You can also find an example of these files in the GitHub repository (
MEDimage/tree/learning/notebooks/tutorial/learning/settings).A tutorial is provided in this notebook:
You can also find it on the repository
MEDimage/notebooks/tutorial/Learning-Tutorial.ipynb.
How to setup your experiment
To fully use the
MEDimagefunctionalities, you must follow certain norms and guidelines:Experiment Name:
The experiment name is the label used to identify your machine learning experiment. In
MEDimagewe use the following format for the experiment name:<Problem>_<Level>_<Modality>. This format is depicted in the following image: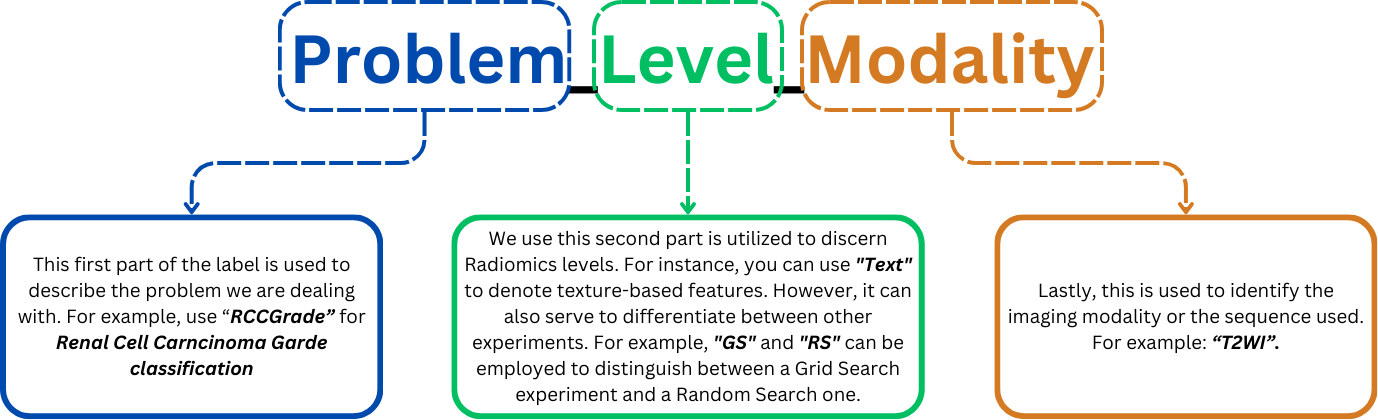
Results Analysis
It is worth noting that to use most functionalities of the results analsys part you must follow the format for the experiment.
Analysis of results involves different key steps:
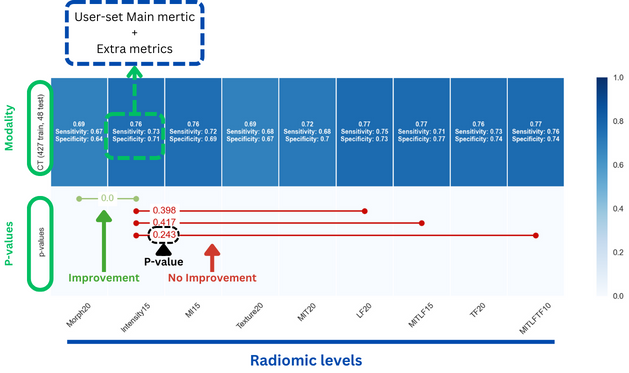
Firstly, a heatmap of metrics can be used to pinpoint the optimal level by the highest performance with minimal complexity:
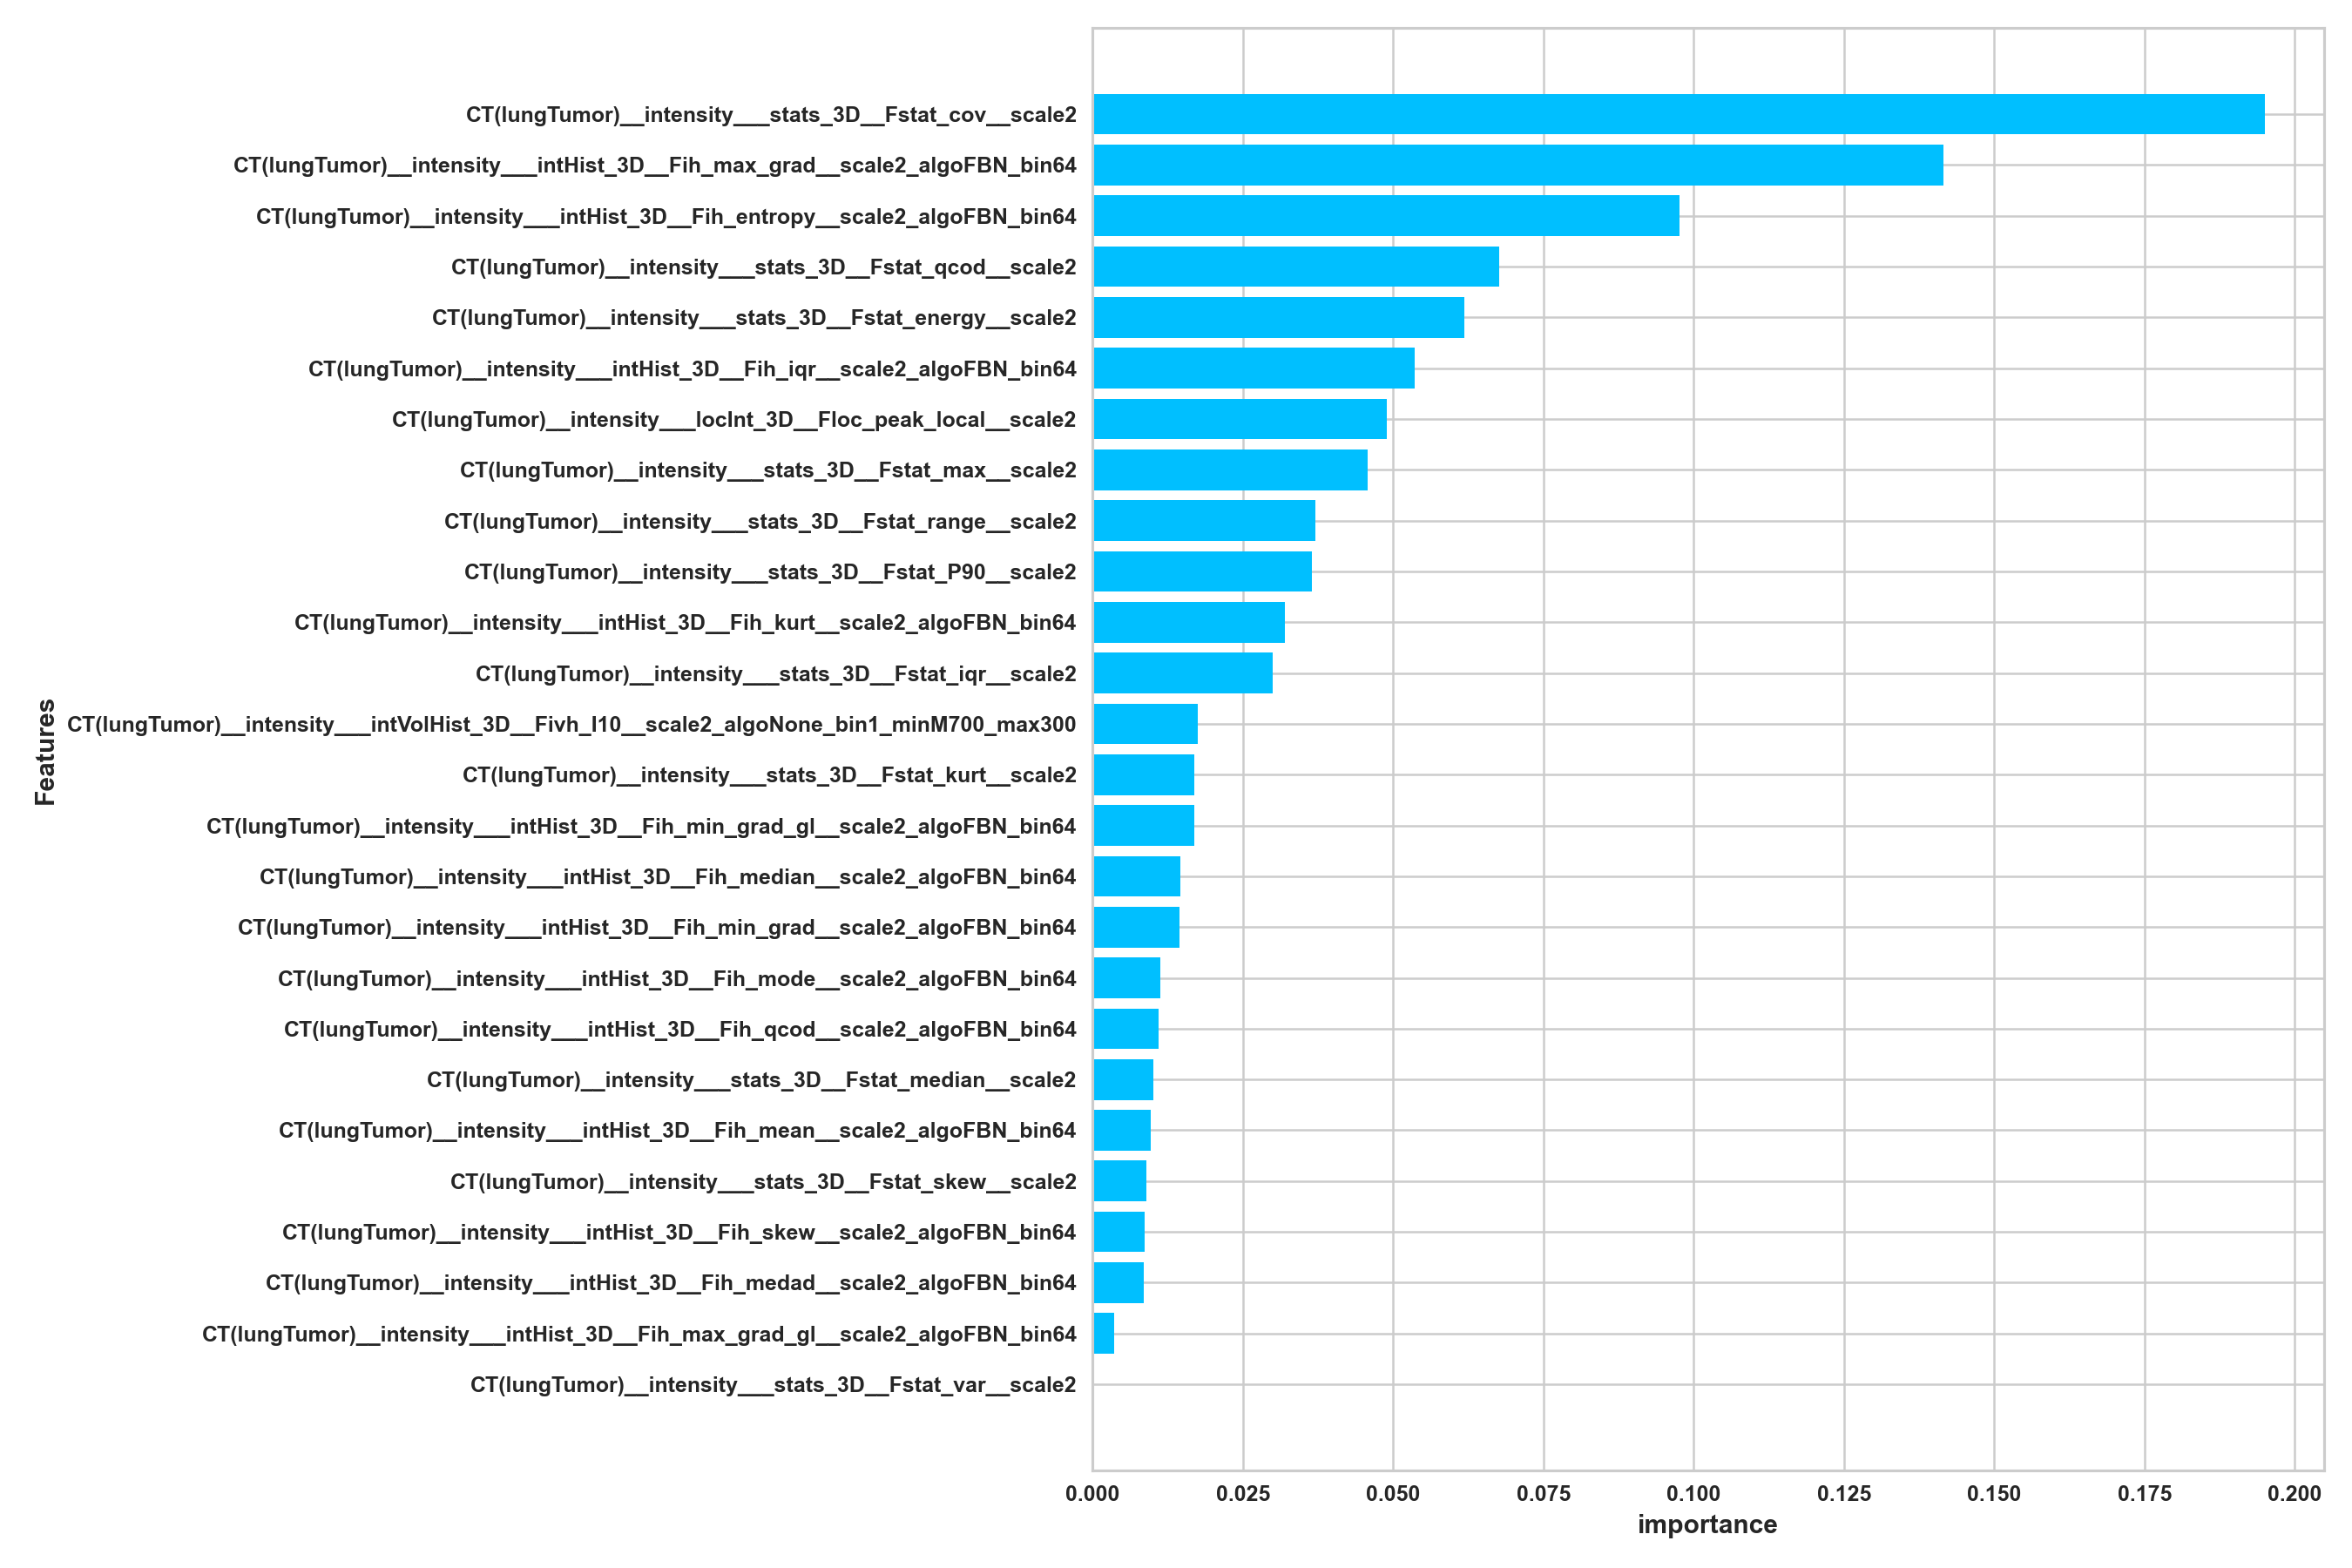
Secondly, a feature importance histogram is employed to further highlight the importance of individual features in the decision-making process:
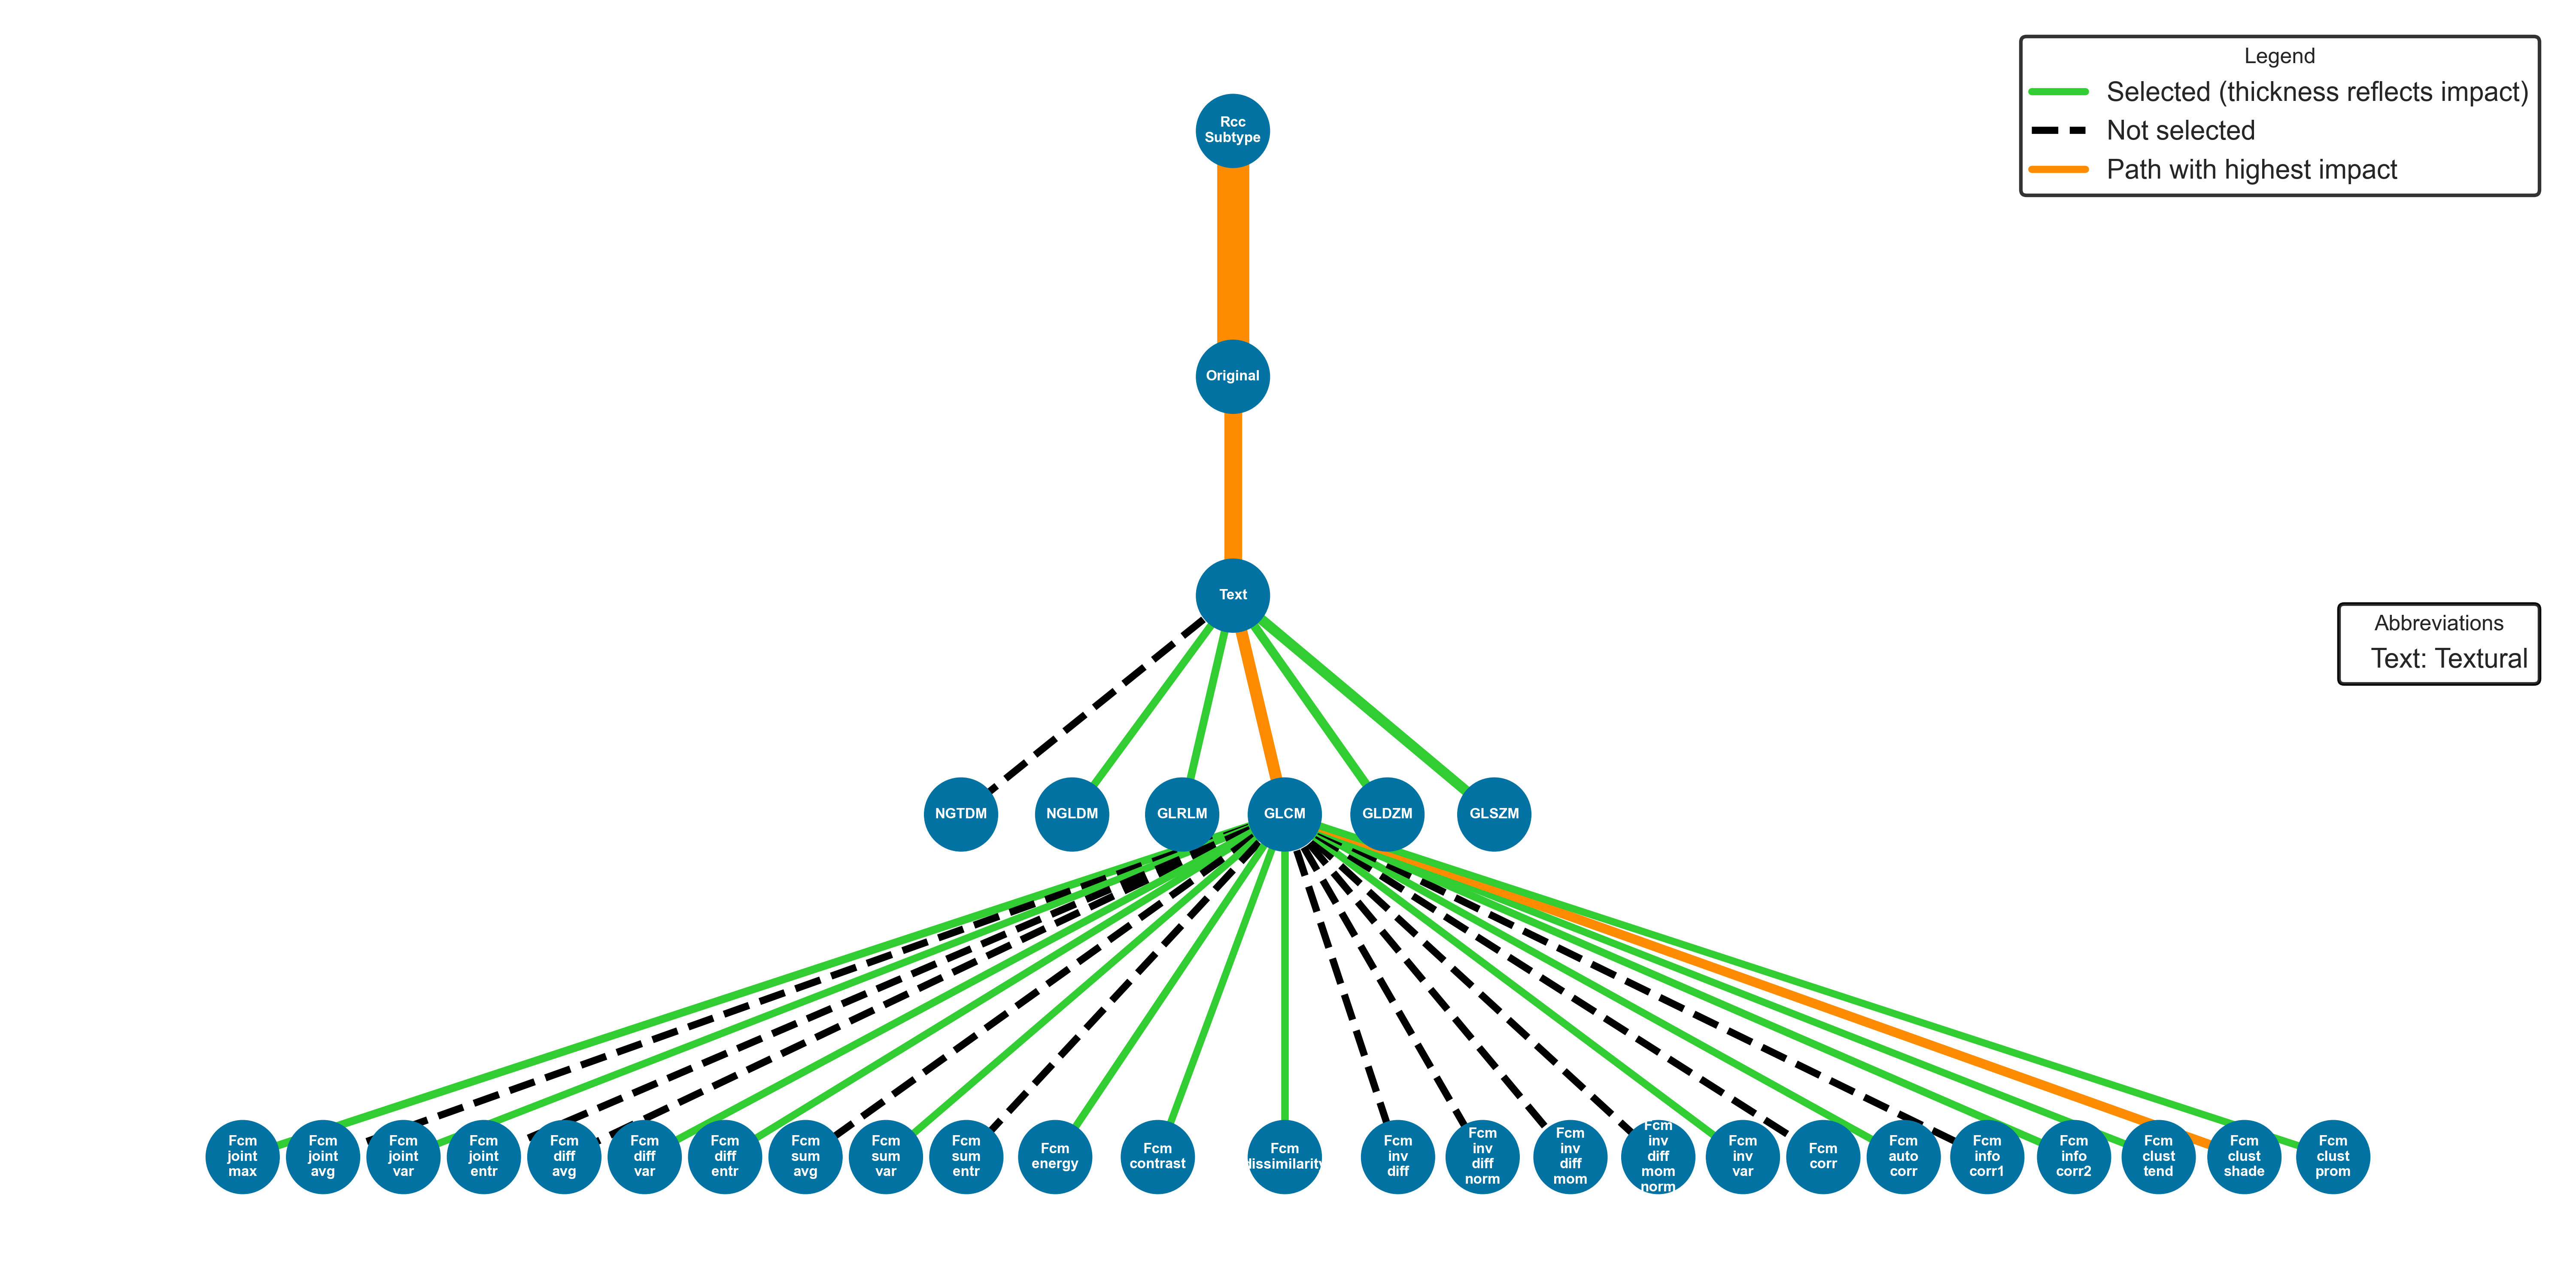
Finally, for certain cases, a feature importance tree is utilized, where branches are connected to features incorporated into the model’s training, and each branch thickness reflects the feature’s importance: